
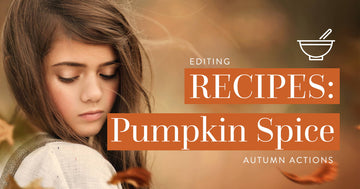
We've cooked up a few editing recipes with our NEW Pumpkin Spice Autumn Actions and are excited to share them with you below (as well as a full edit walk-through)!
Scroll down to take a peek, try them on your own images, and most of all - have fun!
tips for using actions:
- The Opacity Slider is your friend! The key to adjusting the actions to fit your taste is the opacity slider. Adjust it to make each effect stronger or softer.
- Play with Combinations. Layer and stack different actions to build up your unique look.
- Start with a Quality Image. If your photo is poorly lit, has harsh light or poor composition, no manner of editing is going to save it. Make sure that your starting point is quality and your end result after actions will be amazing!
RECIPE #1
Step 1: Vanilla Biscotti @100%
Step 2: Black Harvest Night (brush on)
Step 3: Autumn Fog (brush on)
Step 4: Autumn Skin Tone @ 30%
Step 5: Allspice @ 60%
Step 6: Pumpkin @ 15%
RECIPE #2
Step 1: Cranberry Spice @ 75%
Step 2: Black Harvest Night (brush on)
Step 3: Raisin @ 75%
Step 4: Blue Ridge Parkway @ 47%
Step 5: Creamy Autumn Light @ 100%
Step 6: Autumn Skin Tone @ 30%
Step 4: Autumn Rose Cheeks @ 100%
Step 5: Cinnamon @ 85%
Step 6: More Cyan @ 19%
RECIPE #3
Step 1: Autumn Harvest @ 100%
Step 2: Black Harvest Night (brush on)
Step 3: Raisin @ 30%
Step 4: Autumn Skin Tone @ 30%
Step 5: Creamy Deep Glow @ 100%
RECIPE #4
Step 1: Orchard Punch @ 85%
Step 2: Apples @ 10%
Step 3: Squash @ 90%
Step 4: Black Harvest Night (brush on)
Step 5: Autumn Skin Tone @ 17%
Step 6: Autumn Rose Cheeks @ 49%
Step 7: Ginger Fire @ 90%
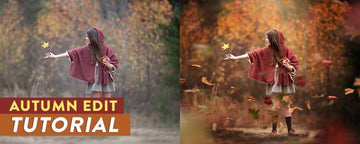
Edit Walk-through
In addition to the recipes above, I wanted to go through one entire image step by step walk-through of one of the recipes to give you all a visual of the steps described. Ready? Let's go!
Before
Vanilla Biscotti
Vanilla Biscotti is one of the foundational Autumn Enchancers. It is a powerful and comprehensive action that is applied to your entire image to give it a warm, Fall boost. You can use the Autumn Enhancers as the only action you use in your editing process (they really are that strong!), or you can use it as your starting point to build upon (which is what we're doing here).
I kept Vanilla Biscotti at 100% opacity.
Black Harvest Night
The next thing I wanted to do was add some depth to the image. To do this, ran the Black Harvest Night action - which creates deep, rich dark tones that you can brush onto your image. After running the action, I used a soft, white brush at a LOW opacity (around 10%) and brushed over the black layer mask to start building up the darkening effect on the image.
I focused on the outer edges to build a vignette in order to draw the eye to the light in the center.
I kept Black Harvest Night at 70% opacity.
Autumn Fog
Next, I wanted to add soft "fog" around my subject to bring more attention to the center and add a touch of soft ambiance to the image. To do this, I ran the Autumn Fog action, then used a soft, white brush at a LOW opacity (around 10%) and brushed over the black layer mask to start building up the fog around her (not on her).
I kept Autumn Fog at 100% opacity.
Autumn Skin Tone
After running the Autumn Fog action, I wanted to run the Autumn Skin Tone action to warm up her skin tone. Once I ran the action, I used a soft, white brush at 100% and brushed the effect onto her skin.
I kept Autumn Skin Tone at 30% opacity.
Allspice
Now that my image was almost finished, I wanted to add some final toning touches to polish up the image. To do this, I went to the "Autumn Toning" section of the action panel. The "Autumn Tones" are simple - and very subtle - color toning layers that add just a tweak of toning to your images to finalize your look.
I decided to use Allspice to give the image a rich, contrasty pop.
I kept Allspice at 60% opacity.
Pumpkin
Lastly, I ran the Pumpkin tone to give the image a soft, orange airy tone. Because I didn't like airy quality on my subject after running the action, I used a soft, BLACK brush to brush over the white layer mask where I wanted to remove the Pumpkin tone from my subject.
I kept Pumpkin at 15% opacity.
Final Before & After
Thank you for joining me for this edit walk-through. If you're interested in learning more about the Pumpkin Spice Autumn Actions, check them out here!
If you're ready to add them to your editing arsenal, grab them with the link below!